
HALO — Hi-Res Audio Loop Output
Your Audio Lounge.
Your DAC. Anywhere in the room.
Audio Lounge’s own high-resolution network audio path—designed to preserve a direct, bit-perfect playback stream from Mac, iPad, iPhone or iPhone Duo to a lightweight Linux endpoint beside your USB DAC.
Choose a HALO Endpoint and its USB DAC directly in Audio Lounge, with DoP and optional PCM upsampling available when you want them.
What is HALO?
A network audio path built around Audio Lounge.
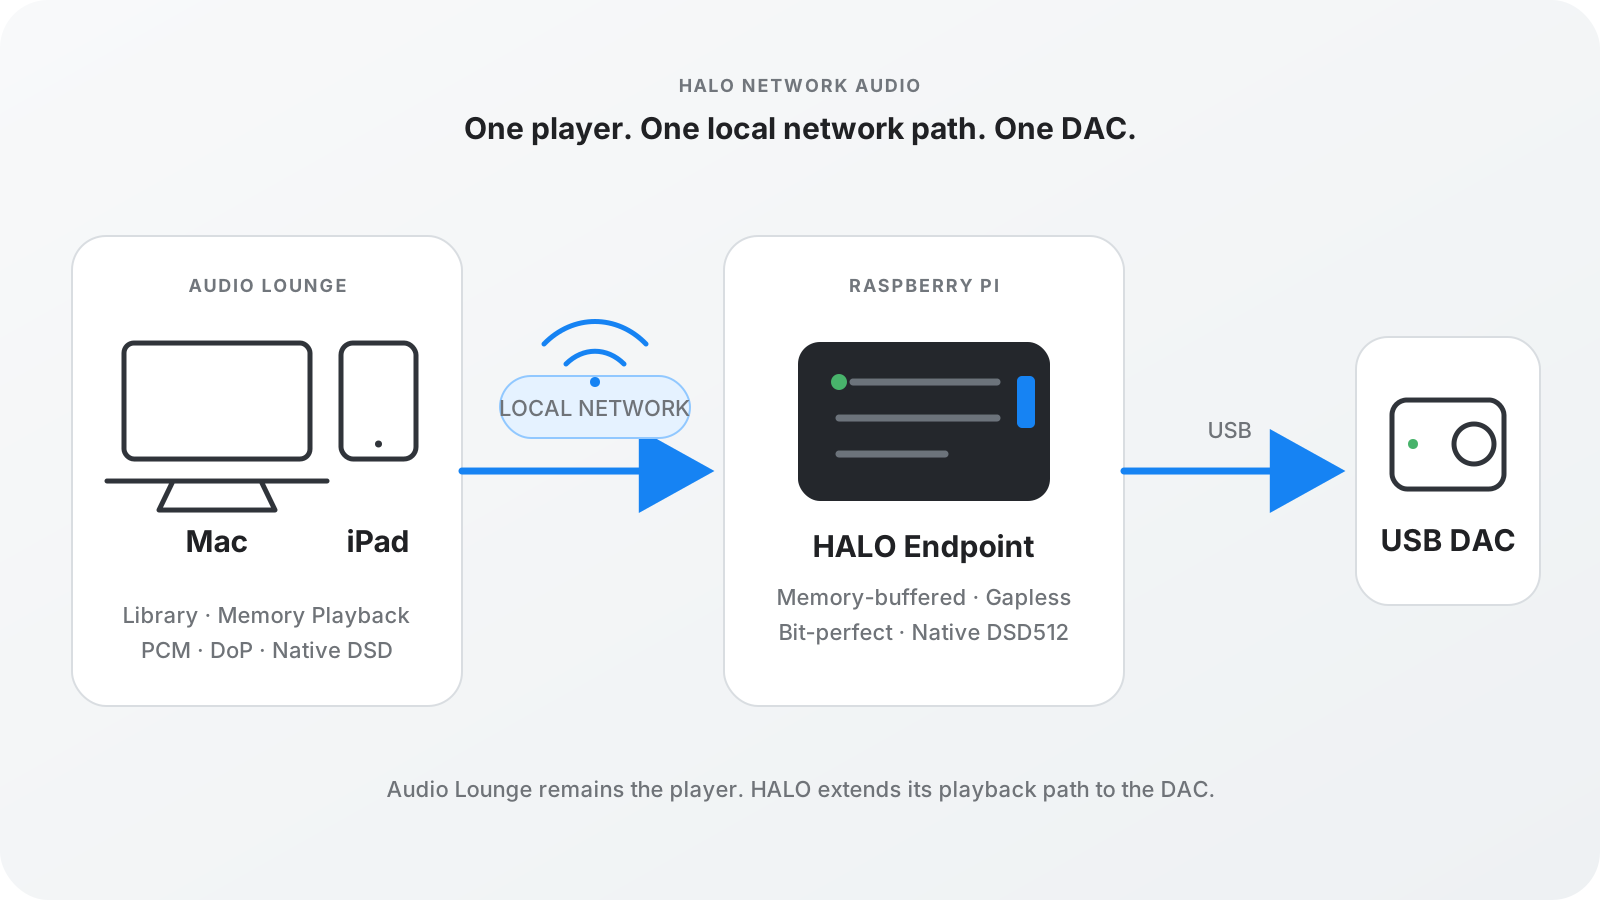
HALO lets Audio Lounge on Mac, iPad, iPhone or iPhone Duo send the prepared high-resolution audio stream over your local network to a HALO Endpoint beside your USB DAC, while preserving the intended playback format—including Native DSD when supported.
Audio Lounge still does the listening work—library, queue, decoding, optional upsampling, DoP preparation, and playback control. HALO carries that prepared audio path across the network. The Endpoint simply presents it to the DAC.
1. Audio Lounge prepares the audio.
Audio Lounge keeps the library, queue, decoding, format choices, and playback control together.
2. HALO carries it over your LAN.
No second library, no separate Core, and no other player taking ownership of the session.
3. The Endpoint feeds the USB DAC.
A lightweight 64-bit Linux endpoint sits beside the Hi‑Fi and outputs to the selected ALSA hardware device.
Bit-perfect PCM
Preserves the prepared PCM stream without unintended mixing or sample-rate conversion in the HALO network path.
Native DSD up to DSD512
For compatible endpoints and DACs, HALO can preserve the Native DSD path without converting it to PCM—a natural fit for DSD enthusiasts.
DoP and optional upsampling
Use DoP with compatible DACs, or choose optional PCM upsampling in Audio Lounge when it suits your system.
Simple by design
Audio Lounge remains the player.
No server. No core. No separate remote. HALO simply extends the Audio Lounge audio path to the DAC.
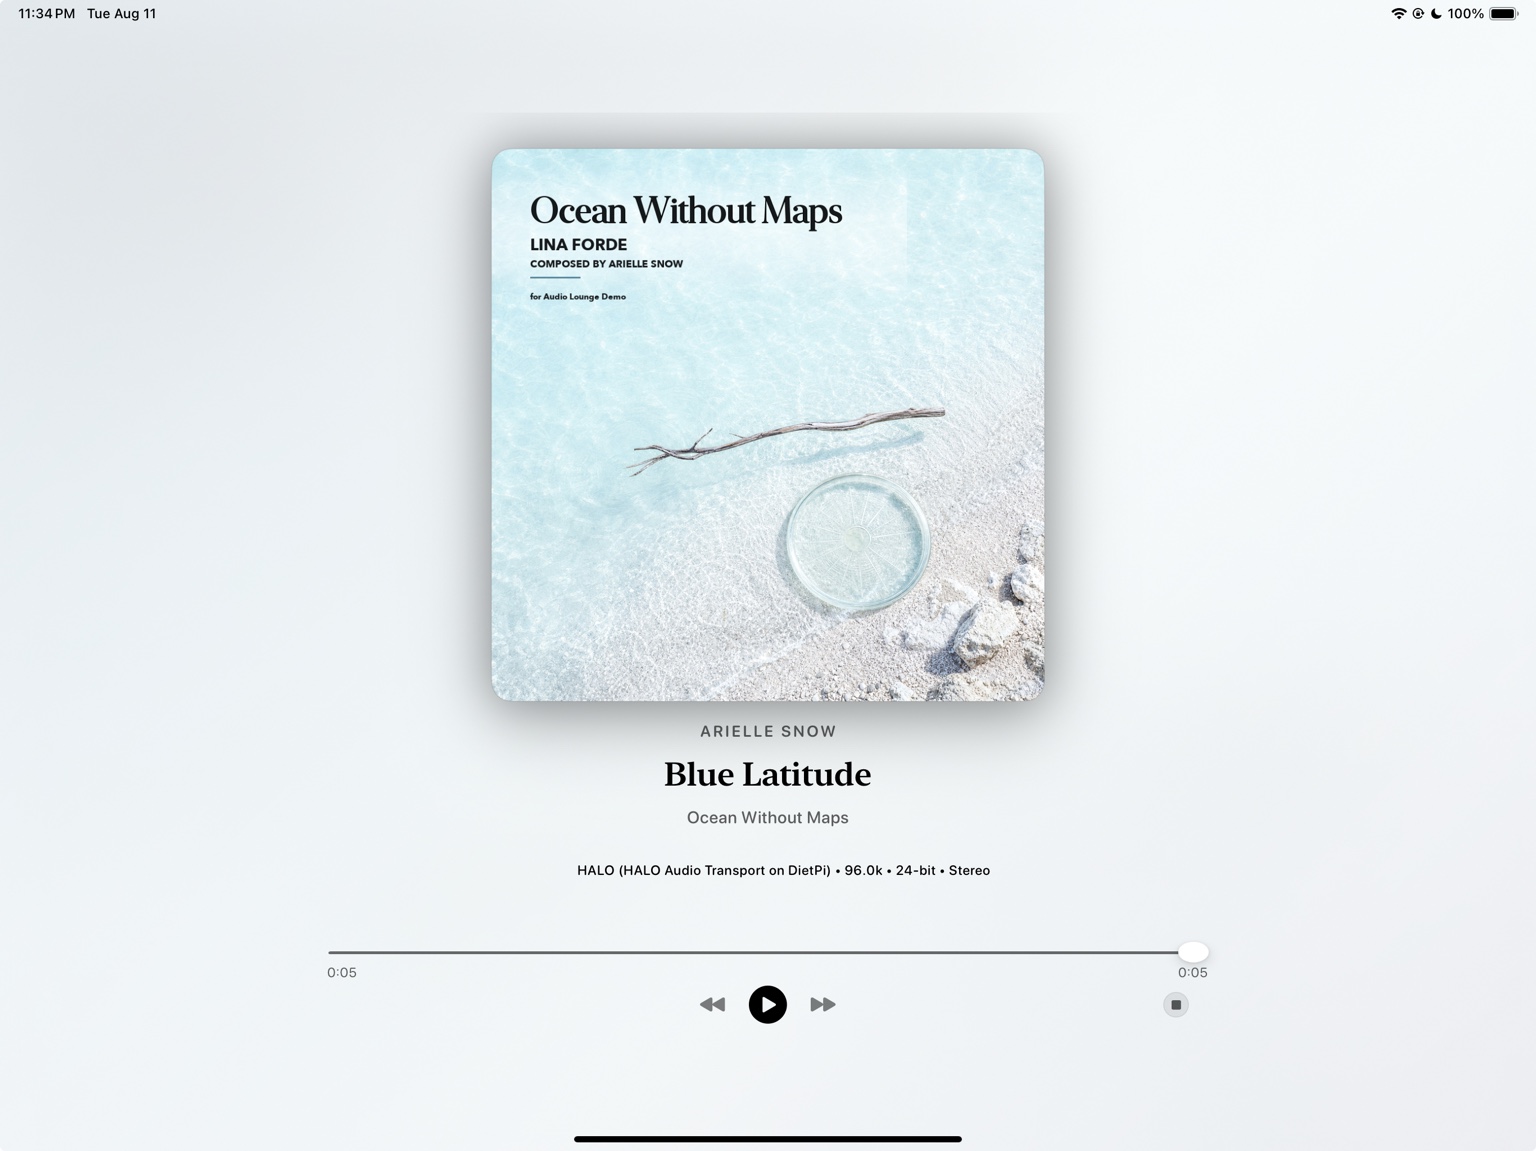
The same HALO path on Mac, iPad, iPhone and iPhone Duo.
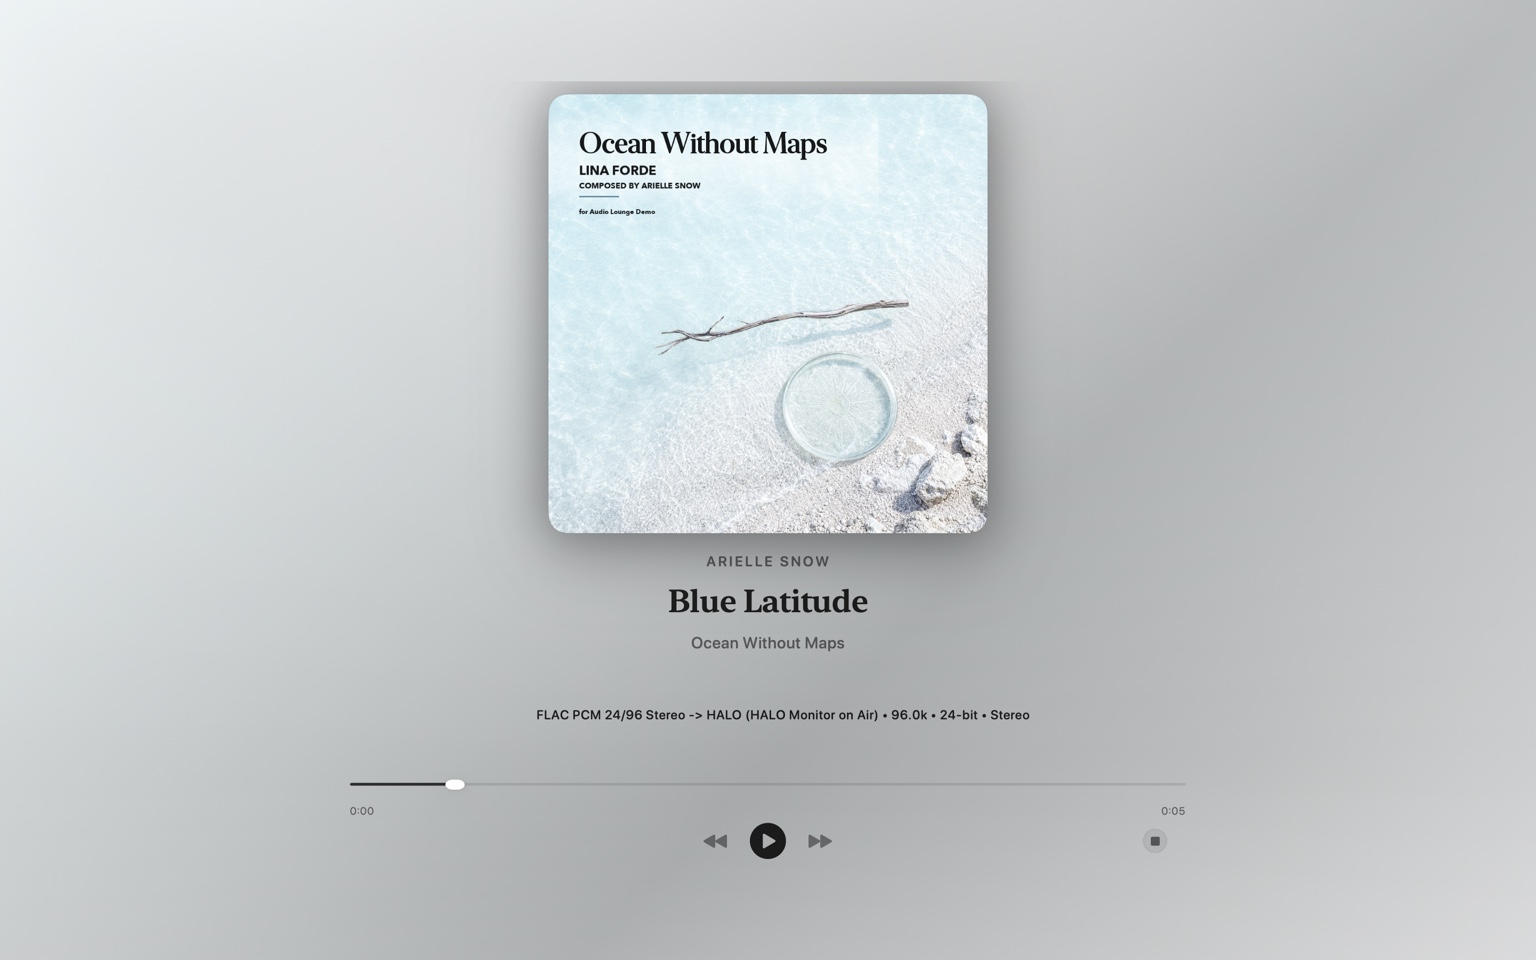
Once HALO is selected, Now Playing shows the network route and final output format directly in Audio Lounge.
HALO Setup
From a fresh endpoint
to music in a few minutes.
Use a small 64-bit Linux computer beside your DAC. DietPi is the simplest dedicated option; Raspberry Pi OS 64-bit and Ubuntu are also supported.
Step 1
Prepare the endpoint.
A HALO Endpoint is the small Linux computer that will sit beside your USB DAC. Install a current 64-bit DietPi, Raspberry Pi OS, or Ubuntu image, power it on, and connect it to the same home network as your Mac, iPad, iPhone or iPhone Duo. Ethernet is recommended for a fixed Hi‑Fi setup.
Before going to Step 2, have these three things ready:
- The endpoint is powered on and connected to your network.
- You know its login name. This is the username you created while preparing Linux. DietPi commonly uses the
rootaccount for setup. - You know its password. Use the password you chose or configured for that Linux installation.
Raspberry Pi OS: if your image-writing tool offers an “Enable SSH” option, turn it on before writing the SD card. Also set a username and password you will remember.
Step 2
Connect to the endpoint with SSH.
SSH sounds technical, but here it simply means: use your Mac to type commands on the little Linux computer beside your DAC. The endpoint does not need its own keyboard, mouse, or monitor.
Open Terminal on your Mac.
Press Command–Space, type Terminal, and press Return. You will see a window with a text prompt.
Enter the SSH command.
Choose the example that matches your endpoint. Replace anything inside < > with your own information.
DietPi
If the standard dietpi.local hostname works on your network:
ssh root@dietpi.localRaspberry Pi OS
Use the username you created when preparing the Pi:
ssh <your-user>@raspberrypi.localUbuntu
Using the endpoint's IP address is usually the clearest option:
ssh <your-user>@<endpoint-ip>On the first connection, type yes.
SSH may say that the authenticity of the host cannot be established and ask whether you want to continue connecting. For your own newly prepared endpoint, type yes and press Return.
Enter the Linux password.
When Terminal asks for the password, type it and press Return. Nothing will appear on the screen while you type—not even dots. That is normal for SSH.
Look for a new prompt.
If the login worked, the prompt will change to something that belongs to the endpoint, such as root@DietPi:~#. You are now controlling the HALO Endpoint from your Mac and can continue to Step 3.
Your Terminal is still on the Mac, but the commands you type now run on the Linux endpoint. Leave this Terminal window open for the next steps.
If .local does not work
Find the endpoint's IP address in your router or Wi‑Fi app, then use the IP instead of the hostname. For example:
ssh root@192.168.1.123Your IP address will probably be different. Look for a device named dietpi, raspberrypi, or the hostname you chose when installing Linux.
Common SSH errors
| What Terminal says | What it usually means | What to do |
|---|---|---|
Could not resolve hostname | The .local name was not found. | Find the endpoint IP in your router and connect using the IP address. |
Connection refused | The endpoint is reachable, but SSH is not running. | Enable SSH on the Linux image or endpoint, reboot it, and try again. |
Permission denied | The username or password is wrong. | Check the login name and password you configured when preparing Linux. |
| The command hangs or times out | The Mac cannot reach the endpoint. | Confirm both devices are on the same home network and the endpoint is actually connected. |
Step 3
Connect your USB DAC.
Power on the DAC and connect it to the endpoint. You can confirm Linux sees an ALSA playback device with:
aplay -lStep 4
Install HALO Endpoint.
Keep the same SSH Terminal window open. Copy the command below, paste it into Terminal, and press Return. The installer will automatically choose the correct HALO binary for the endpoint, install what HALO needs, and start the service.
You do not need to download a file manually, compile source code, or install a development environment.
Raspberry Pi OS / Ubuntu
curl -fsSL https://audiolounge.app/halo/install.sh | sudo bashDietPi root shell
curl -fsSL https://audiolounge.app/halo/install.sh | bashWhen prompted, choose the actual ALSA hardware device for your DAC, preferably a hw:CARD,DEVICE output.
Step 5
Open Audio Lounge and listen.
At this point you can leave Terminal alone and return to Audio Lounge.
Open Audio Lounge.
Make sure the Mac, iPad, iPhone or iPhone Duo is on the same local network as the HALO Endpoint.
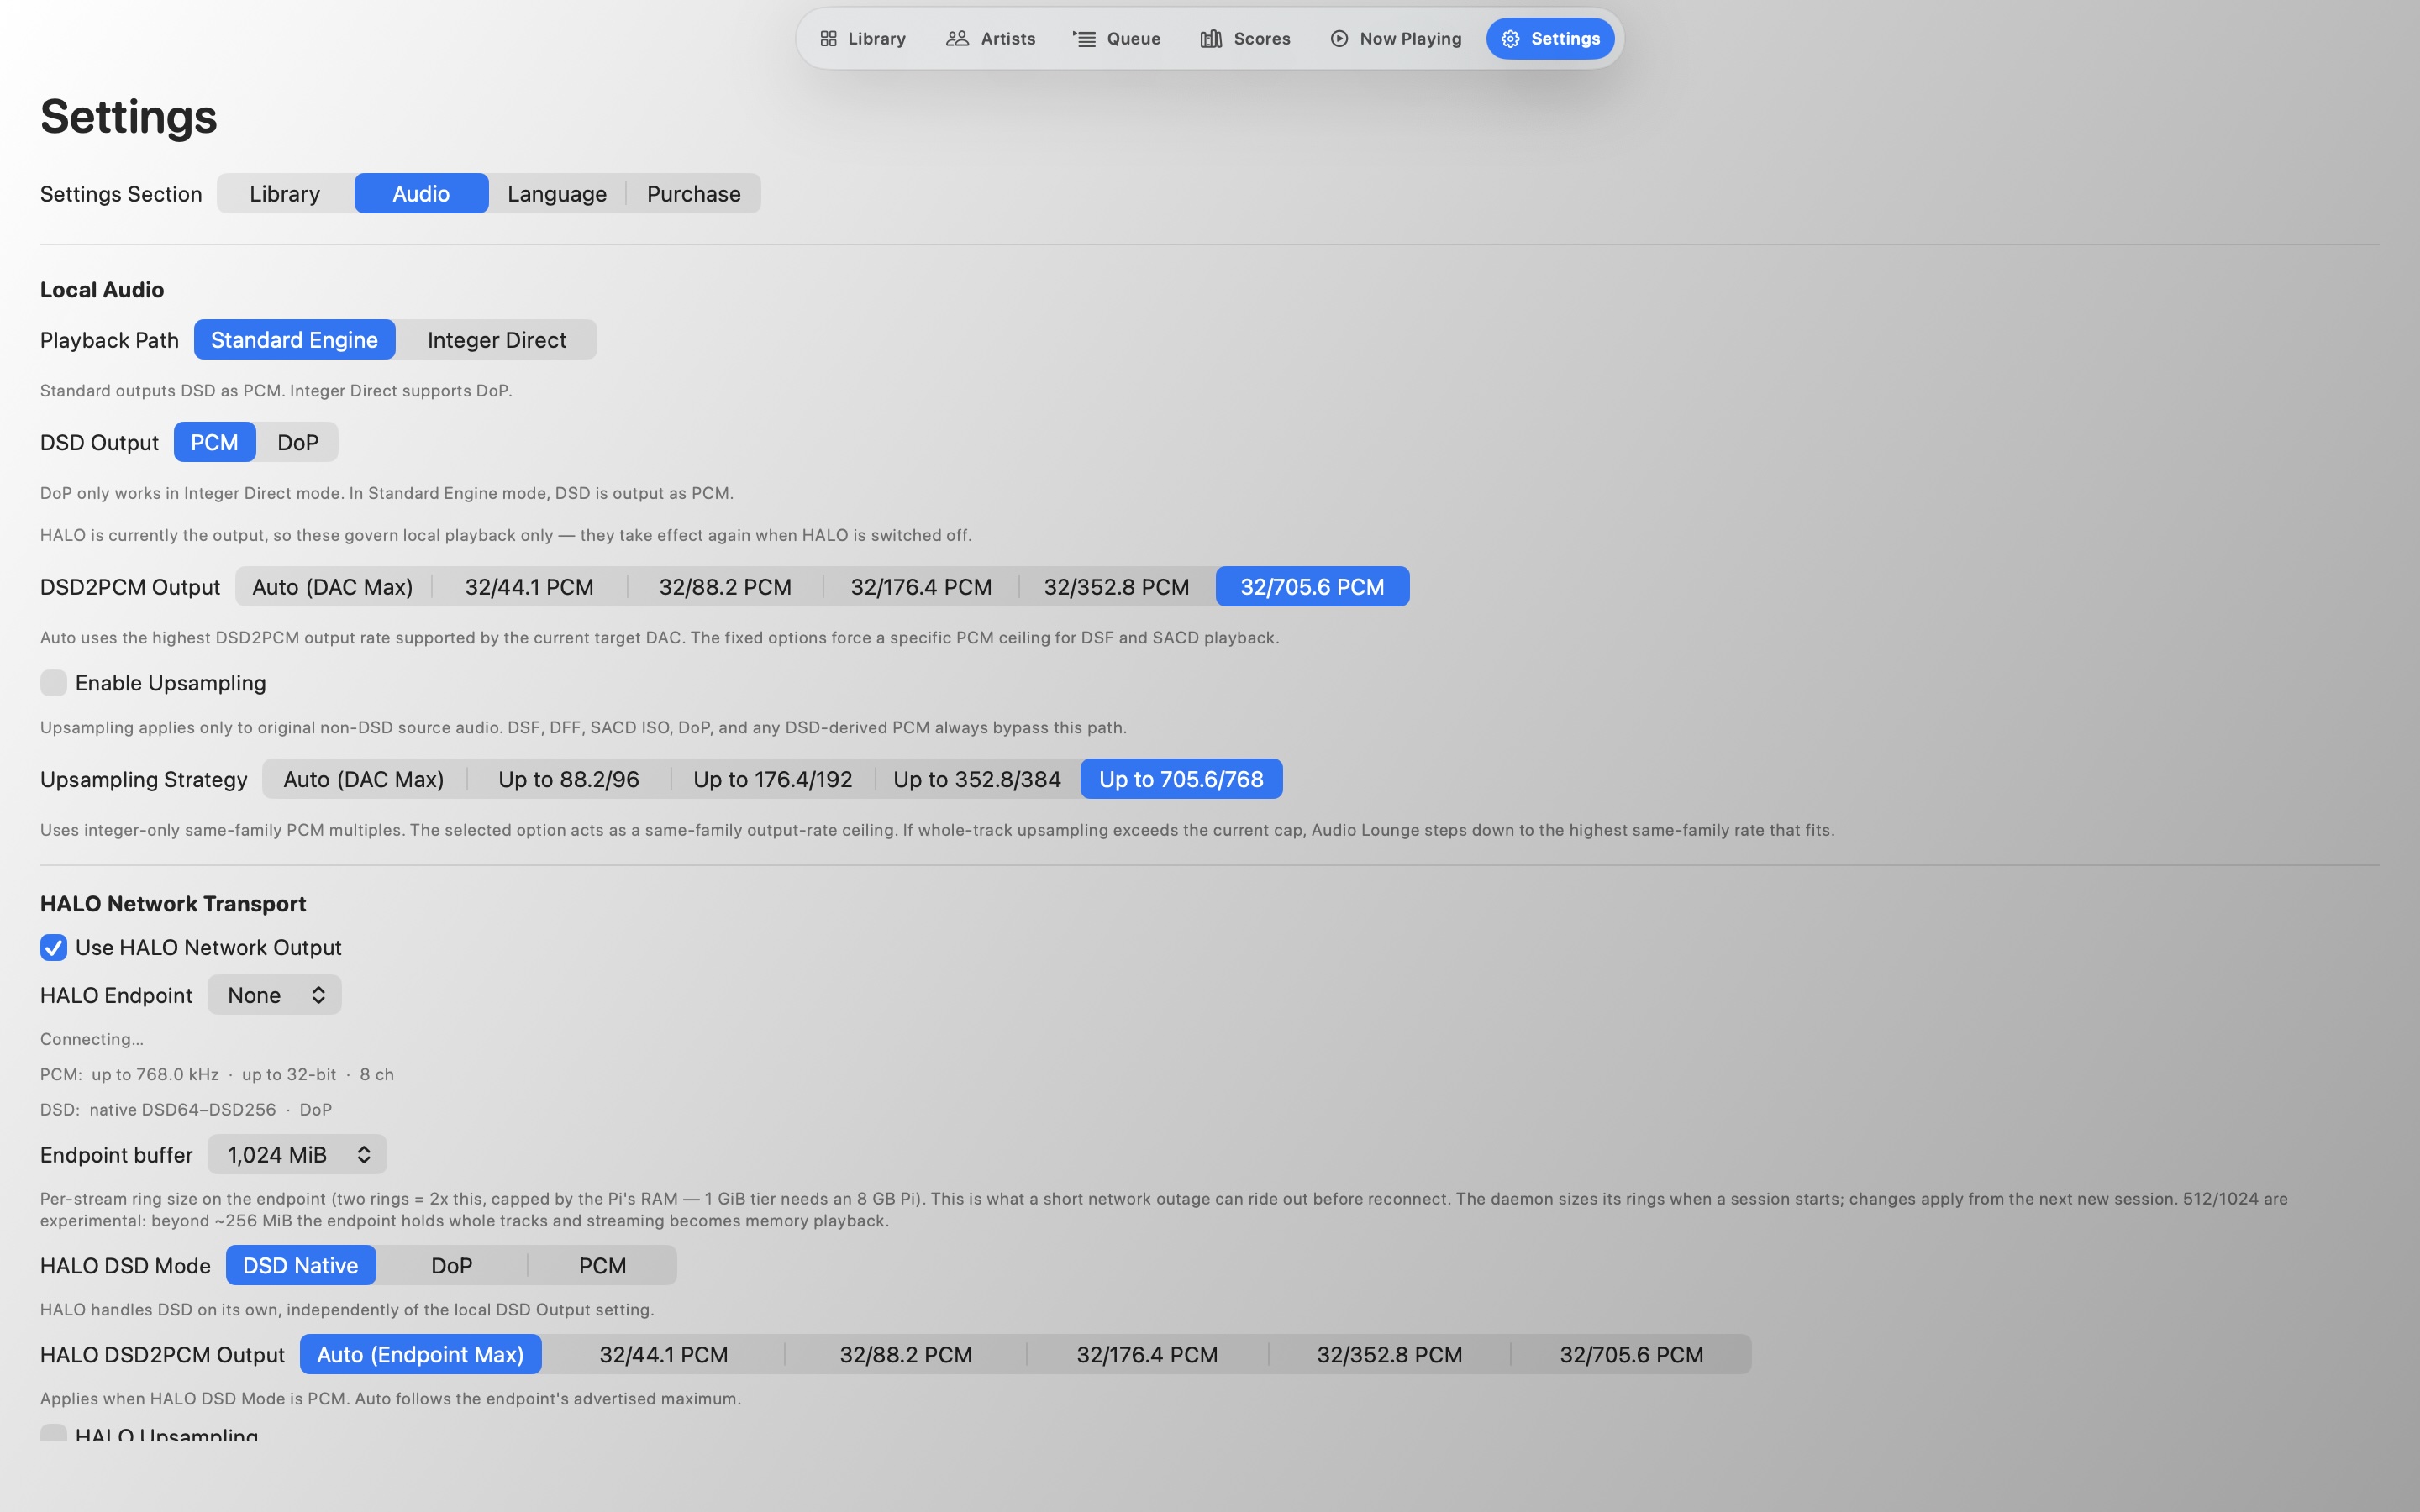
Open the Output selector.
Choose the HALO Endpoint that Audio Lounge discovered on the network.
Start playback.
Audio Lounge continues to control the library and playback path; HALO sends that audio to the USB DAC beside your Hi‑Fi.
Troubleshooting
Quick checks.
HALO service
systemctl status halo-daemon --no-pager
journalctl -u halo-daemon -n 50 --no-pager
Network connection
Make sure Audio Lounge and HALO Endpoint are on the same LAN and that guest Wi‑Fi/client isolation is not enabled. On iPad, iPhone and iPhone Duo, allow Audio Lounge access to the Local Network.
Curious why HALO exists? Read “Why I Built HALO” →